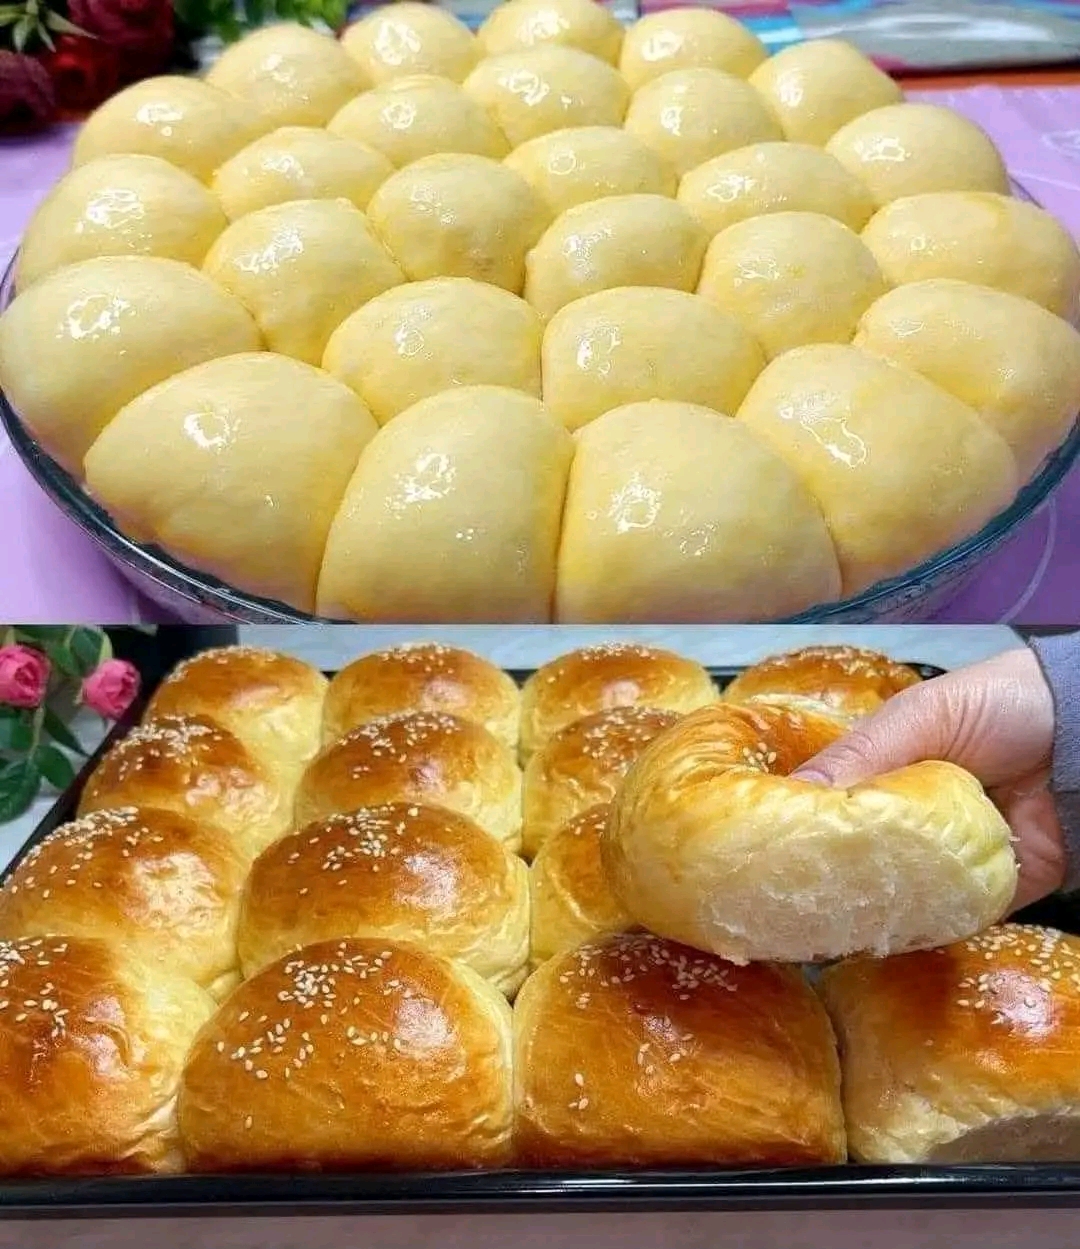
There’s a particular kind of joy that happens the second a tray of homemade soft dinner rolls comes out of the oven — that deep golden top, the little wisps of steam, and the way everyone at the table suddenly finds a reason to hover near the kitchen. These rolls are soft enough to pull apart with your fingers, fluffy all the way through, and finished with a glossy egg wash that gives them that irresistible bakery-shine.
I first started making this recipe for a holiday dinner when store-bought rolls just weren’t cutting it anymore. One batch in, and I was hooked — the dough comes together easily, doesn’t require any fancy equipment, and the payoff is a batch of buns so soft they practically melt when you butter them warm. Whether you sprinkle sesame seeds on top or keep them plain and glossy, they turn out beautifully every time.
This is the kind of recipe that becomes a permanent fixture in your rotation. It’s forgiving for beginners, impressive enough for guests, and endlessly adaptable — you can shape the dough into a round pan for pull-apart rolls or line them up on a baking sheet for individual buns. Once you get the hang of the dough, you’ll find yourself making these for everything from Sunday roasts to weeknight soup nights.
Why You’ll Love This Recipe
- Unbelievably soft texture — thanks to a simple enriched dough with milk and butter, these rolls stay tender for days.
- Beginner-friendly — no stand mixer required, and the steps are simple enough for a first-time bread baker.
- Ready in about 2.5 hours — most of that is hands-off rising time, so active work is minimal.
- Endlessly versatile — great plain, with sesame seeds, brushed with garlic butter, or turned into slider buns.
- Freezer-friendly — make a double batch and stash extras for busy weeks.
Ingredient Notes
The magic of this dough comes down to a few enriching ingredients: whole milk, butter, and eggs. Whole milk gives the softest crumb, but 2% works fine in a pinch — just avoid skim, which can leave the rolls slightly drier. If you want an even richer, more golden interior, swap one of the eggs for two egg yolks.
For the flour, all-purpose flour works beautifully here and gives a tender, pillowy texture. If you prefer a slightly chewier roll with more structure, bread flour is a great substitute — just note it may need a splash more milk since it absorbs more liquid. Instant yeast is the easiest option since it skips the proofing step, but active dry yeast works too; just dissolve it in warm milk (about 110°F) with a pinch of sugar for 5–10 minutes until foamy before mixing.
A quality tip that makes a real difference: use room-temperature butter and eggs. Cold ingredients slow down gluten development and can make your dough stiffer to work with, which affects how soft the final rolls turn out. If you’re topping with sesame seeds, toast them lightly beforehand for extra flavor and a deeper golden color.
[Recipe card goes here]
Step-by-Step Instructions
1. Activate the yeast (if using active dry). Warm the milk to about 110°F — it should feel like a warm bath, not hot. Stir in the yeast and a pinch of sugar, then let it sit for 5–10 minutes until foamy. Tip: If the milk is too hot, it can kill the yeast and your rolls won’t rise. Use a thermometer if you’re unsure.
2. Mix the dough. In a large bowl, combine the flour, sugar, salt, yeast mixture, eggs, and softened butter. Mix until a shaggy dough forms.
3. Knead until smooth. Knead by hand for about 8–10 minutes, or with a stand mixer fitted with a dough hook for 5–6 minutes, until the dough is smooth, soft, and slightly tacky but not sticky. Tip: If the dough sticks too much to your hands, add flour one tablespoon at a time — too much flour is the most common cause of dense rolls.
4. First rise. Place the dough in a lightly greased bowl, cover with plastic wrap or a damp towel, and let rise in a warm spot for 60–90 minutes, or until doubled in size.
5. Shape the rolls. Punch down the dough gently and divide into 16–20 equal pieces. Roll each piece into a smooth, tight ball by cupping your hand over the dough and rolling it against the counter. Tip: A tight shaping technique creates surface tension, which is what gives the rolls that smooth, rounded top.
6. Second rise. Arrange the shaped rolls close together in a greased round pan or baking dish. Cover loosely and let rise again for 30–45 minutes, until puffy and touching each other.
7. Egg wash and bake. Preheat your oven to 350°F (175°C). Brush the tops generously with beaten egg, and sprinkle with sesame seeds if desired. Bake for 20–25 minutes, until deeply golden on top. Tip: Tent the rolls loosely with foil if they’re browning too quickly before the centers are fully baked.
8. Cool slightly, then serve. Let the rolls cool in the pan for 5–10 minutes before pulling apart and serving warm, ideally with a pat of butter melting into the top.
Nutrition Snapshot (Per Roll, Estimated)
- Calories: ~150
- Protein: 4g
- Carbohydrates: 22g
- Fat: 5g
These values are approximate and will vary based on exact ingredients and roll size.
Storage & Reheating
These rolls keep well at room temperature in an airtight container or zip-top bag for up to 3 days. To refresh them, wrap a few rolls in foil and warm in a 300°F oven for about 8–10 minutes, or microwave individually for 10–15 seconds for a quick soften.
For longer storage, freeze the fully baked and cooled rolls in a freezer bag for up to 3 months. Thaw at room temperature, then warm in the oven wrapped in foil to bring back that fresh-baked softness. You can also freeze the shaped, unbaked dough balls and bake straight from frozen, adding a few extra minutes to the bake time.
Budget Note
This recipe is easy on the wallet — a full batch of 16–20 rolls typically costs somewhere around $4–6 total, working out to about 25–35 cents per roll, since the ingredients (flour, milk, butter, eggs, yeast) are pantry staples. To stretch the budget even further, buy yeast in bulk jars rather than individual packets, and skip the sesame seed topping if you’re keeping costs minimal — the rolls are just as delicious plain.
Variations to Try
Lighter Version: Swap the butter for a light margarine or reduce it by half, and use low-fat milk. The rolls will be slightly less rich but still soft, making this a good option if you’re watching calories without giving up the pull-apart texture.
Garlic Butter Rolls: After baking, brush the warm rolls with a mixture of melted butter, minced garlic, and chopped parsley for a savory twist that pairs beautifully with pasta dinners or holiday spreads.
Dairy-Free Swap: Replace the milk with unsweetened almond or oat milk, and use a plant-based butter substitute in equal quantities. The texture stays remarkably close to the original, though the rolls may brown slightly less on top.
Meal-Prep Friendly: Shape and freeze the dough balls ahead of time on a tray, then transfer to a bag once solid. Pull out however many you need, let them thaw and rise overnight in the fridge, then bake fresh whenever you want warm rolls without the full prep time.
Frequently Asked Questions
Can I make the dough ahead of time? Yes — after the first rise, punch down the dough, cover tightly, and refrigerate overnight. Let it come to room temperature and finish rising before shaping and baking the next day.
Why didn’t my rolls rise properly? This is usually due to yeast that’s expired or milk that was too hot and killed the yeast. Double-check your yeast’s expiration date and make sure your milk is warm, not hot, before mixing.
Can I use bread flour instead of all-purpose? Yes, bread flour works well and gives a slightly chewier structure. You may need to add a tablespoon or two more milk since bread flour absorbs more liquid than all-purpose.
What can I use instead of egg wash? A mixture of melted butter or a splash of milk brushed on top will still give a nice sheen, though the color won’t be quite as deep golden as with an egg wash.
Can I make these into slider buns? Absolutely — shape the dough into slightly larger pieces, flatten them gently before the second rise, and bake as directed. They make excellent slider or burger buns.
Related Recipes You Might Like
- Homemade Brioche Burger Buns
- Garlic Butter Parker House Rolls
- No-Knead Honey Wheat Bread
Recipe and photos inspired by classic pull-apart milk bun techniques. Estimated nutrition and cost figures are approximations — actual values will vary by brand and portion size.