Introduction
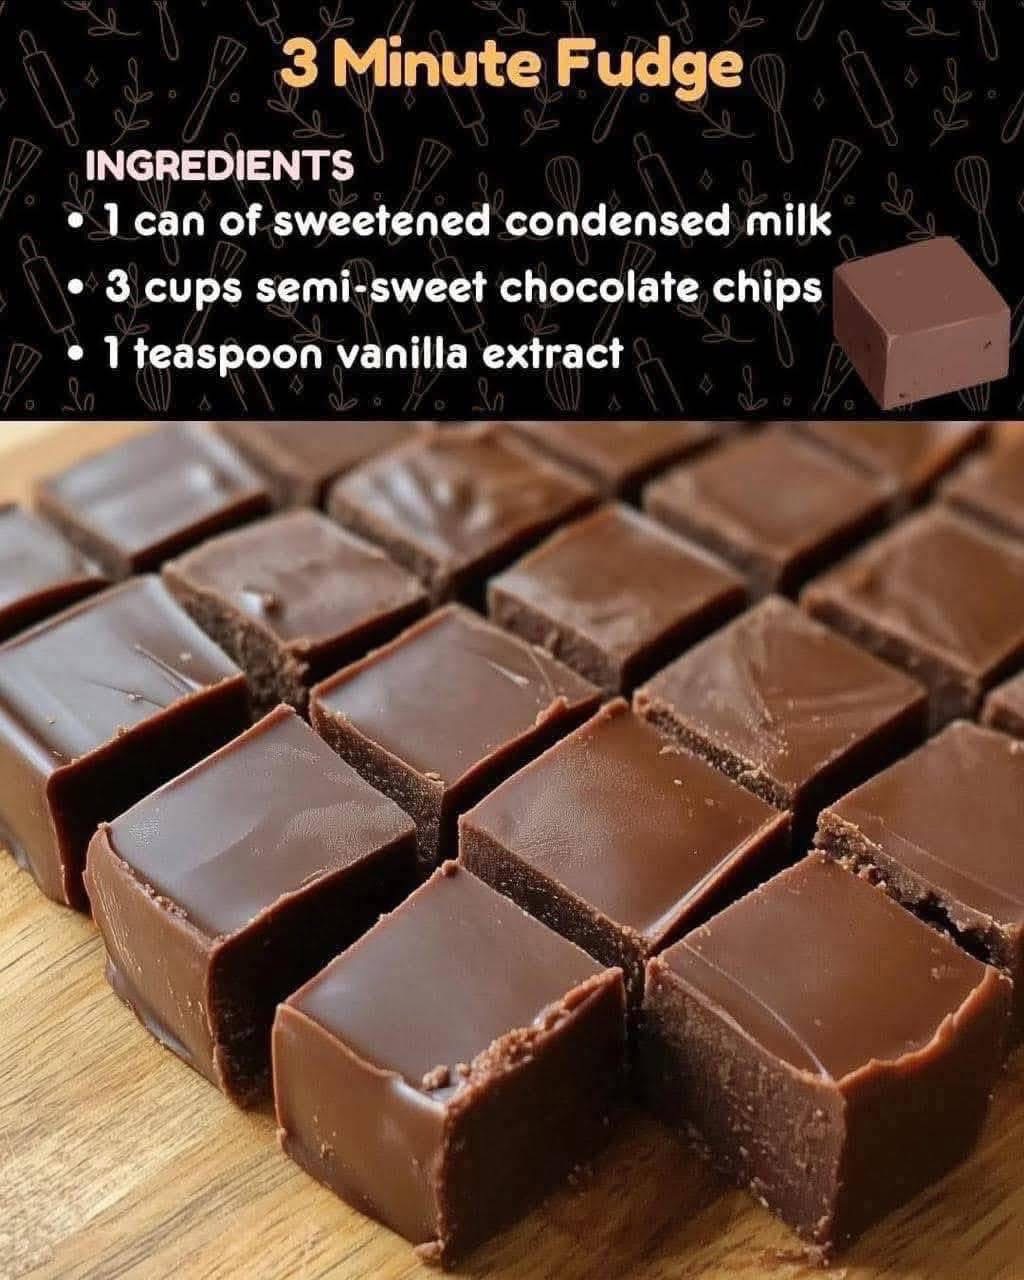
If you’ve ever wanted rich, creamy homemade fudge without babysitting a candy thermometer, this 3 minute fudge recipe is about to change your life. Just three pantry staples — sweetened condensed milk, chocolate chips, and vanilla extract — melt together into a glossy, decadent fudge that sets up perfectly every single time.
I love this one because it completely demystifies fudge-making. No candy thermometer, no soft-ball stage guesswork, no standing over a pot stirring for twenty minutes straight. It’s the kind of recipe that makes you look like you spent hours in the kitchen when really, the hardest part is waiting for it to set.
Whether you’re making a quick holiday treat, a last-minute gift, or just satisfying a serious chocolate craving, this fudge delivers every time. Let’s get into it.
Why You’ll Love This Recipe
- Only 3 ingredients — pantry staples you probably already have on hand.
- No candy thermometer needed — completely foolproof, even for beginners.
- Ready in minutes — the actual cooking takes about 3 minutes, start to finish.
- Rich, creamy texture — smooth, dense, and deeply chocolatey in every bite.
- Great for gifting — cuts into neat squares that look impressive with almost no effort.
Ingredient Notes
Sweetened condensed milk is what makes this fudge so foolproof — its high sugar content and thick consistency create a smooth, stable base without needing to monitor sugar temperatures like traditional fudge recipes require. Make sure to use sweetened condensed milk, not evaporated milk, since the two are easy to mix up but behave very differently in this recipe.
Semi-sweet chocolate chips give this fudge a balanced sweetness that isn’t overly sugary, but you can swap in milk chocolate chips for a sweeter, milder fudge or dark chocolate chips for a deeper, more intense flavor. Using good-quality chocolate chips makes a noticeable difference here, since chocolate is really the star of the show in such a simple recipe.
A teaspoon of vanilla extract rounds out the flavor and keeps the fudge from tasting one-note sweet, so it’s worth using real vanilla extract rather than imitation if you have it. From here, the recipe is easy to customize with mix-ins like nuts, sea salt, or crushed cookies, so feel free to make it your own once you’ve got the base technique down.
🍫 3 Minute Fudge Recipe
Prep Time: 5 minutes | Cook Time: 3 minutes | Chill Time: 2 hours | Total Time: about 2 hours 10 minutes Servings:16 (makes one 8×8-inch pan)
Ingredients
For the Fudge:
- 1 (14 oz) can sweetened condensed milk
- 3 cups semi-sweet chocolate chips
- 1 tsp vanilla extract
- Pinch of salt (optional, enhances the chocolate flavor)
Optional Mix-Ins:
- 1/2 cup chopped nuts (walnuts or pecans)
- Flaky sea salt, for topping
- 1/2 cup mini marshmallows or crushed cookies
Instructions
Step 1: Prepare your pan. Line an 8×8-inch baking dish with parchment paper, leaving a little overhang on the sides to make lifting the fudge out easier later. Lightly grease the parchment paper if you’d like extra insurance against sticking.
Step 2: Combine the condensed milk and chocolate. In a medium saucepan over low heat, combine the sweetened condensed milk and chocolate chips. Tip: keep the heat low throughout this entire process — chocolate can scorch and seize up quickly over higher heat, which will ruin the smooth texture you’re going for.
Step 3: Melt, stirring constantly. Stir the mixture constantly with a rubber spatula as it heats, melting the chocolate chips into the condensed milk. This should take about 3 minutes total, and the mixture will go from separate ingredients to a smooth, glossy, unified fudge base.
Step 4: Remove from heat and add vanilla. Once the mixture is completely smooth and no chocolate chip lumps remain, remove the saucepan from the heat and stir in the vanilla extract and a pinch of salt, if using. Stir until fully incorporated.
Step 5: Fold in any mix-ins. If you’re adding nuts, marshmallows, or other mix-ins, fold them in now while the fudge mixture is still warm and pourable. Tip: work quickly here, since the mixture will start to thicken as it cools and becomes harder to fold ingredients into evenly.
Step 6: Pour into the prepared pan. Pour the fudge mixture into the lined baking dish, using the spatula to spread it into an even layer. Smooth the top as best you can, since this will be the visible surface once it’s flipped out and sliced.
Step 7: Chill until set. Cover the pan and refrigerate for at least 2 hours, or until the fudge is completely firm to the touch. For best results, avoid cutting into it before it’s fully set, since it will still be soft and won’t hold clean edges.
Step 8: Slice and serve. Once fully set, lift the fudge out of the pan using the parchment paper overhang and transfer it to a cutting board. Cut into small squares using a sharp knife, wiping the blade clean between cuts for the neatest edges.
Recipe Notes
- For the cleanest cuts, run your knife under hot water and wipe it dry between each slice.
- If your fudge doesn’t set firm enough after 2 hours, give it more time in the fridge — humidity and exact ingredient brands can occasionally affect set time.
- This fudge also freezes beautifully, making it a great make-ahead treat for holidays or gifting.
Nutrition Snapshot (Estimated, Per Serving)
- Calories: ~190
- Protein: ~2g
- Carbs: ~26g
- Fat: ~9g
These numbers are estimates based on standard ingredients (one square per serving, from a 16-piece batch) and will vary depending on brands used and exact portion sizes.
Storage & Reheating
Fudge will keep in an airtight container at room temperature for up to a week, or in the fridge for up to 3 weeks. Since this is a no-bake treat, there’s no reheating involved — just let refrigerated fudge sit at room temperature for a few minutes before serving if you prefer it slightly softer.
This fudge freezes exceptionally well: wrap individual squares in plastic wrap or layer them with parchment paper in a freezer-safe container, and store for up to 3 months. Thaw in the fridge overnight or at room temperature for about an hour before serving.
Budget Note
This recipe costs about $0.50–0.75 per serving, making it one of the most affordable homemade treats you can make, especially compared to store-bought fudge or gift boxes of chocolate. To save even further, buy chocolate chips and condensed milk during holiday baking sales, when both are frequently discounted.
Variations
Nutty Version: Fold in 1/2 cup of chopped walnuts or pecans right before pouring the mixture into the pan for extra texture and a slightly nutty flavor. This is a classic addition that pairs especially well with semi-sweet or dark chocolate.
Rocky Road Version: Stir in mini marshmallows and chopped nuts together for a rocky road-style fudge, and consider adding a swirl of extra marshmallow on top before it sets. This variation adds fun texture contrast to the otherwise smooth, dense fudge.
Salted Chocolate Version: Sprinkle flaky sea salt over the top of the fudge right after pouring it into the pan, before it sets. The salty-sweet contrast makes the chocolate flavor pop even more and gives the fudge a slightly more sophisticated finish.
Dark Chocolate Version: Swap the semi-sweet chocolate chips for dark chocolate chips for a richer, more intense fudge with a slightly less sweet finish. This variation pairs especially well with the sea salt topping if you’d like to combine both twists.
Frequently Asked Questions
Can I make this ahead of time? Yes — this fudge is actually a great make-ahead treat since it keeps well for weeks in the fridge or months in the freezer. It’s a perfect option to prepare a few days before a holiday or gathering.
What can I use instead of chocolate chips? Chopped chocolate bars work well in place of chocolate chips and often melt just as smoothly, sometimes even more so since they don’t contain stabilizers that help chips hold their shape. Just make sure to chop them into small, even pieces so they melt evenly.
Why didn’t my fudge set properly? This usually happens from not giving it enough chilling time, or from substituting evaporated milk for sweetened condensed milk by mistake, since the two behave very differently. Double-check your can before starting, and give the fudge extra time in the fridge if it still seems too soft after 2 hours.
Can I double this recipe? Yes — this recipe doubles easily; just use a 9×13-inch pan instead of an 8×8-inch pan to accommodate the extra volume, and expect the fudge to take slightly longer to melt and set given the larger quantity. The stirring time on the stove may need to be extended slightly as well.
What should I serve with 3 minute fudge? This fudge is delicious on its own, but it also pairs beautifully with a scoop of vanilla ice cream or alongside a cup of coffee or hot cocoa. It makes a lovely addition to a holiday dessert platter alongside cookies and other sweets.
Related Recipes
- No-Bake Chocolate Peanut Butter Bars
- Classic Chocolate Chip Cookies
- Easy Homemade Chocolate Truffles