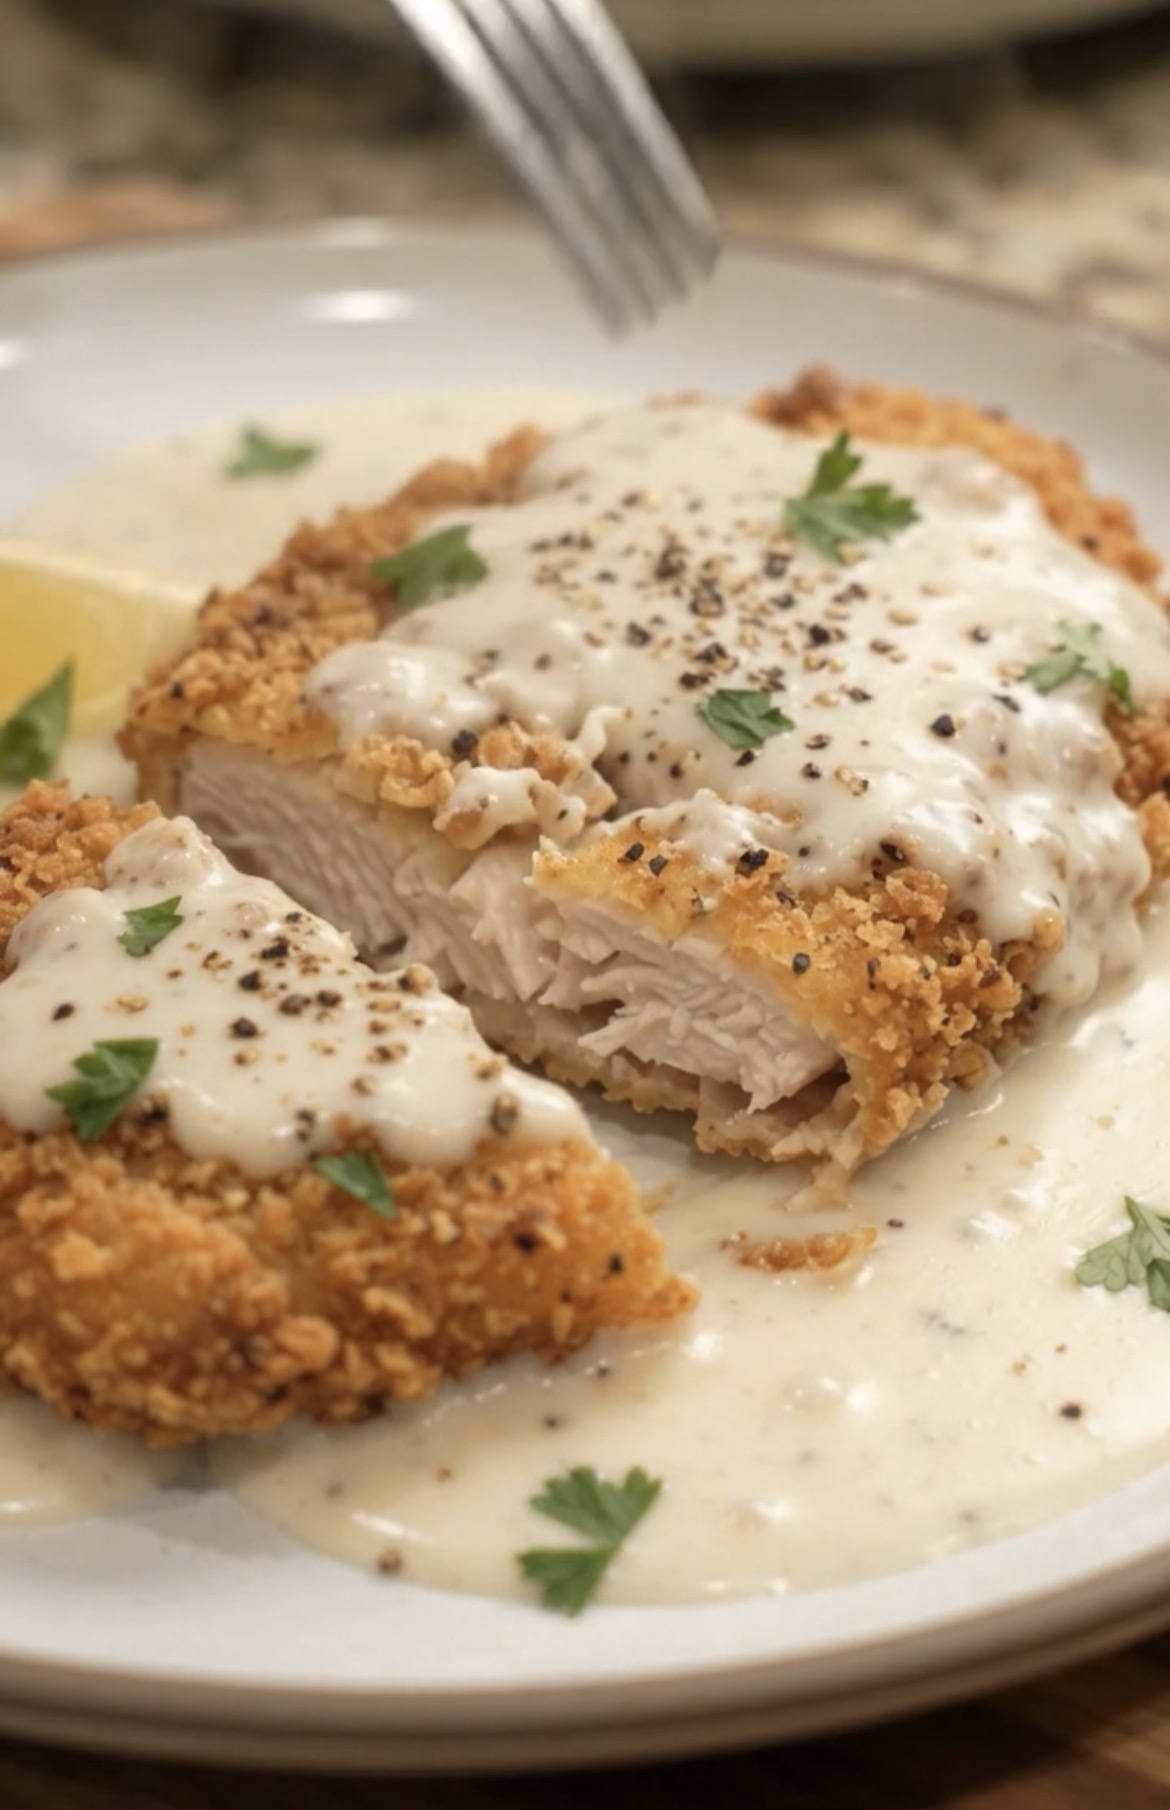
Country fried chicken with white gravy is the kind of comfort food that makes a kitchen feel like home the second it hits the pan. This version is built to work with chicken straight from the freezer, so you don’t have to plan a whole day ahead just to get that crispy, golden crust and rich, peppery gravy on the table tonight.
Because starting from frozen changes how the chicken cooks, this recipe leans on a gentle par-cook step before breading and frying, which ensures the inside is fully and safely cooked through by the time the outside turns golden and crisp. It’s a small extra step, but it’s the difference between chicken that’s perfectly done all the way through and chicken that looks done on the outside but isn’t quite there in the middle.
Once the chicken is fried and resting, the same skillet becomes the base for a simple, creamy white gravy studded with black pepper, made from the flavorful browned bits left behind. Spoon it generously over the chicken and a scoop of mashed potatoes, and you’ve got a dinner that tastes like it came straight out of a diner, made completely from your own freezer and pantry.
Why You’ll Love This Recipe
- Works from frozen chicken — no full-day thawing plan required.
- Crispy, golden crust — classic country fried chicken texture.
- Rich, peppery white gravy — made right in the same skillet.
- Ultimate comfort food — pairs perfectly with mashed potatoes or biscuits.
- Simple, pantry-friendly ingredients — nothing hard to find here.
Ingredient Notes
Boneless chicken breasts or thighs both work for this recipe, though thighs tend to stay juicier, especially with the extra par-cooking step involved when starting from frozen. If using breasts, consider pounding them to an even thickness after the par-cook step, which helps them fry more evenly and stay tender.
For the breading, a simple mixture of flour, salt, pepper, garlic powder, onion powder, and paprika gives a classic, well-seasoned crust. A quick dip in buttermilk (or a milk-and-vinegar substitute) before breading helps the coating adhere better and adds a subtle tang that’s characteristic of good country fried chicken.
For the gravy, whole milk gives the richest, creamiest texture, though 2% milk can be used for a slightly lighter version. Freshly cracked black pepper is essential here — it’s really the signature flavor of a good white gravy, so don’t be shy with it, and taste as you go to get the level of pepperiness you like best.
[Recipe card goes here — ingredients, step-by-step instructions, and a “Jump to Recipe” button render automatically in this spot.]
Step-by-Step Instructions
- Par-cook the frozen chicken. Place the frozen chicken in a pot of simmering water or broth and gently poach for about 12–15 minutes, until it reaches an internal temperature of about 150°F (it will finish cooking during frying). Tip: this step is essential when starting from frozen — it ensures the inside cooks through fully without burning the crust during frying.
- Pound to an even thickness. Pat the par-cooked chicken dry and pound gently to an even thickness if needed, which helps it fry evenly and stay tender. Tip: placing the chicken between two pieces of plastic wrap before pounding keeps things tidy and prevents tearing.
- Set up the breading station. Whisk together buttermilk and a beaten egg in one bowl, and combine the flour with salt, pepper, garlic powder, onion powder, and paprika in another. Dip each piece of chicken in the buttermilk mixture, then dredge in the seasoned flour, pressing gently to help it adhere. Tip: letting the breaded chicken rest for 5–10 minutes before frying helps the coating stick even better and reduces the chance of it falling off in the pan.
- Fry until golden and cooked through. Heat about a half-inch of oil in a heavy skillet over medium heat and fry the chicken for 3–4 minutes per side, until deeply golden and the internal temperature reaches at least 165°F. Tip: since the chicken was already par-cooked, this step is mostly about building a crispy, golden crust rather than cooking it through from scratch — but always confirm with a meat thermometer.
- Make the gravy. Remove the chicken to a paper-towel-lined plate, pour off all but about 2 tablespoons of the oil, and whisk in flour to make a roux, cooking for about a minute. Gradually whisk in the milk, stirring constantly until smooth and thickened. Tip: keeping a couple tablespoons of the flavorful browned bits and oil in the pan is what gives the gravy its deep, savory flavor, so don’t wipe the skillet clean before starting this step.
- Finish and serve. Season the gravy generously with black pepper and salt to taste, then spoon it warm over the fried chicken alongside mashed potatoes or biscuits.
Nutrition Snapshot (Estimated, Per Serving)
These are approximate values based on one chicken breast with gravy per serving and will vary depending on exact cuts and portion sizes used.
- Calories: ~520
- Protein: ~38g
- Carbs: ~24g
- Fat: ~30g
Storage & Reheating
Leftovers keep well in an airtight container in the fridge for up to 3–4 days, though it’s best to store the chicken and gravy separately so the crust doesn’t get soggy. Reheat the chicken in a 375°F oven for about 10–15 minutes to help re-crisp the coating, and warm the gravy separately on the stovetop, adding a splash of milk if it’s thickened too much.
The fried chicken freezes reasonably well on its own for up to 2 months, though the crust will soften somewhat after thawing and reheating. The gravy is best made fresh, since cream and milk-based gravies can separate or turn grainy after being frozen and thawed.
Budget Note
This recipe comes out to roughly $2.50–$3.50 per serving, making it a fairly budget-friendly comfort food option. To bring the cost down further, use chicken thighs instead of breasts, and stretch the gravy over a generous portion of mashed potatoes or biscuits so the meal feels even more filling per person.
Variations to Try
Spicy version: Add cayenne pepper to both the breading and the gravy for a spicier take on this classic comfort food combination.
Oven-finished version: After frying just until golden, transfer the chicken to a wire rack on a baking sheet and finish in a 375°F oven for 8–10 minutes to ensure it’s fully cooked through while keeping the crust from over-browning in the skillet.
Sausage gravy twist: Brown a bit of breakfast sausage in the skillet before making the roux, leaving the cooked, crumbled sausage in the gravy for a heartier, more traditional biscuits-and-gravy-style variation.
Meal-prep friendly: Fry the chicken ahead of time and store it separately from the gravy, reheating the chicken in the oven to re-crisp it and making a fresh batch of gravy closer to serving time for the best texture.
Frequently Asked Questions
Do I really need to par-cook the chicken first? Yes, when starting from fully frozen chicken — without this step, the outside can brown before the inside is safely cooked through. If using fresh or fully thawed chicken, you can skip straight to breading and frying.
Can I use fresh chicken instead of frozen? Yes — if using fresh or thawed chicken, skip the par-cooking step and go straight to pounding, breading, and frying, checking the internal temperature to confirm it reaches 165°F.
Why did my breading fall off during frying? This usually happens when the chicken isn’t patted dry enough before breading, or when it’s flipped too soon in the pan. Let the crust set undisturbed for a couple of minutes before flipping, and let the breaded chicken rest for a few minutes before frying.
Can I make the gravy ahead of time? It’s best made fresh close to serving time, since milk-based gravies thicken and can separate as they sit, but you can measure out the flour and seasoning ahead of time to speed up the process.
Is this recipe spicy? No, this is a classic, peppery-but-mild comfort food dish as written — add cayenne to the breading or gravy if you’d like more heat.
Related Recipes
- Slow Cooker Copycat KFC-Style Chicken
- Slow Cooker Fried Chicken Mac and Cheese Bowl
- Creamy Garlic Parmesan Shrimp